A lot of aspiring voice actors think they need to spend $5,000 or more before they can start recording auditions. I've seen people put off their VO career for years because they believed they couldn't afford a "real" studio. The truth is, you can build a home voiceover studio that produces broadcast-quality audio for well under $500. I've helped hundreds of students do exactly that.
Let me walk you through the essentials, what to buy first, and where you can safely cut corners without sacrificing sound quality.
Understanding What "Good Enough" Actually Means
Your home studio setup doesn't need to rival a commercial facility. It needs to do two things well: capture clean audio from your microphone and keep unwanted noise out of your recordings.
Clients and casting directors care about audio quality, but they're listening for clarity, low noise floor, and a natural sound. They're not analyzing your frequency response curves. A treated closet with a $200 mic will beat an untreated living room with a $2,000 mic every single time.
That's the key principle behind a budget recording studio: spend your money on the right things in the right order.
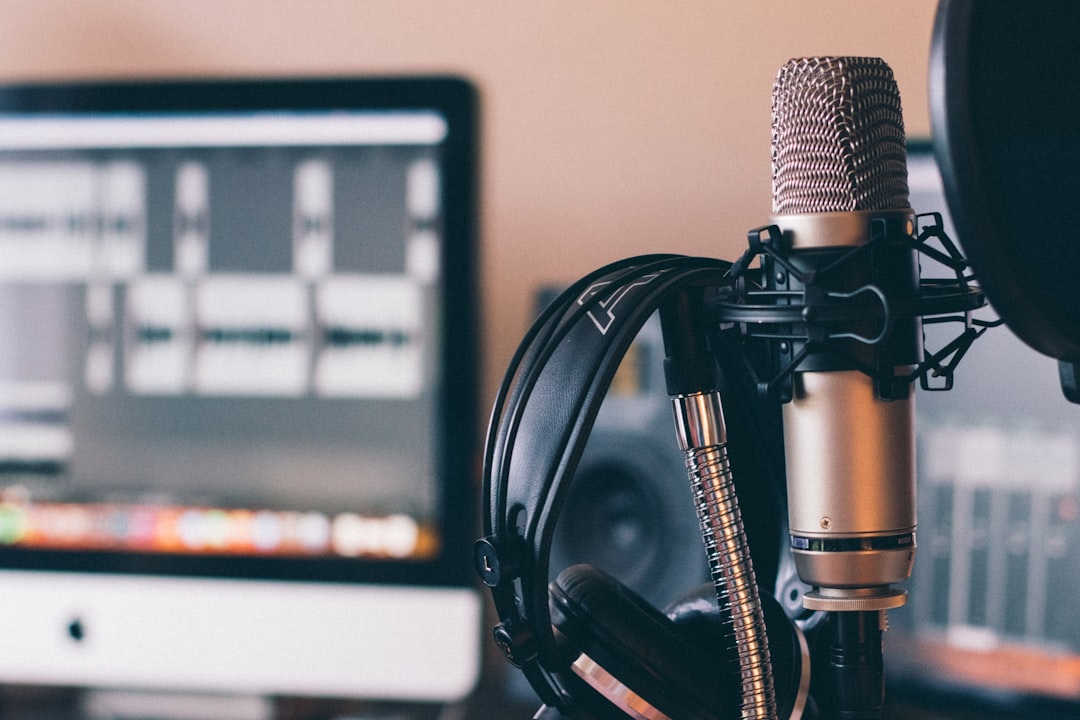
The Microphone: Your Most Important Investment
If there's one place to put most of your budget, it's here. You don't need a top-tier microphone, but you do need a decent one. Here are my go-to recommendations for voice actors starting out (for a deeper dive on mic types and polar patterns, check out our guide to choosing the right microphone):
- Audio-Technica AT2020 (around $100). A solid large-diaphragm condenser that sounds great on most voices. This is the mic I recommend most often to new students.
- Rode NT1 5th Gen (around $250). If you can stretch your budget, this mic has an incredibly low self-noise and a warm, natural tone. Many working pros still use it.
- Audio-Technica ATR2100x-USB (around $100). A dynamic USB/XLR hybrid mic. The dynamic element rejects more room noise, which is a huge advantage if your space isn't perfectly treated yet.
A quick note on USB vs. XLR: USB microphones are simpler and cheaper since they plug directly into your computer. XLR mics require an audio interface but give you better audio quality and more flexibility as you grow. If budget is extremely tight, start USB. If you can swing an extra $100 for an interface, go XLR from day one.
The Audio Interface: Keeping It Simple
If you go the XLR route, you'll need an audio interface to connect your mic to your computer. Fortunately, you don't need anything fancy for voiceover work. You're recording one voice on one mic, so a single-channel interface is perfectly fine.
My top budget picks:
- Focusrite Scarlett Solo (around $120). The industry standard starter interface. Clean preamps, reliable drivers, just works.
- PreSonus AudioBox USB 96 (around $100). A solid alternative at a slightly lower price point.
Plug in your mic, set your gain, and you're recording. That's really all there is to it.
Acoustic Treatment: Where Most People Go Wrong
This is the piece that makes or breaks your voiceover studio, and it's where I see beginners make the most mistakes. Foam panels from Amazon stuck on your bedroom wall will not do the job. Those thin tiles might knock down a little flutter echo, but they won't address the low-frequency reflections and room resonance that make home recordings sound boxy and amateurish.
Here's what actually works on a budget:
Option 1: The Closet Booth
Walk-in closets filled with hanging clothes are surprisingly effective recording spaces. The clothing acts as natural absorption across a wide frequency range. Add a moving blanket on the wall you're facing, and you've got a very workable space for free.
Option 2: DIY Blanket Booth
Hang thick moving blankets (the kind movers use, not thin fleece throws) around a PVC pipe frame or from a ceiling-mounted curtain track. Four heavy moving blankets cost about $60-80 total and provide real sound absorption. Surround yourself on three sides plus overhead, and you'll be shocked at how dead and clean your recordings sound.
Option 3: A Reflection Filter Plus Blankets
Something like the Kaotica Eyeball (around $120) or a cheaper reflection filter combined with blankets behind you can work in a pinch. These aren't a substitute for proper treatment, but they help when combined with other absorption.
The goal is to surround yourself with soft, dense material that absorbs sound reflections before they reach your microphone. Spend time experimenting with placement. Record yourself, listen back on headphones, and adjust until the room sound disappears. For more on this topic, read our post on sound treatment and isolation at home.
Software and Headphones: The Final Pieces
Good news here: you can get professional recording and editing software for free.
- Audacity. Free, open source, and does everything you need for VO recording, editing, and processing.
- Reaper. Technically $60 for a personal license, but offers a fully functional free evaluation period. More powerful than Audacity with better plugin support.
For headphones, grab a pair of Sony MDR-7506 (around $80). They've been the broadcast and studio standard for decades. They're accurate, comfortable for long sessions, and built like tanks. You need closed-back headphones so the sound doesn't leak into your mic during directed sessions.
You'll also want a basic pop filter ($10-15) and a mic stand or boom arm ($20-40). Don't skip the pop filter. Plosive sounds (hard P's and B's) will ruin otherwise clean takes.
Putting It All Together: Your Budget Breakdown
Here's what a complete home studio setup looks like at two price points:
The $250 Build:
- ATR2100x-USB dynamic mic: $100
- Sony MDR-7506 headphones: $80
- Moving blankets (4 pack): $60
- Pop filter and desk stand: $25
The $500 Build:
- Audio-Technica AT2020 (XLR): $100
- Focusrite Scarlett Solo: $120
- Sony MDR-7506 headphones: $80
- Moving blankets and PVC frame: $80
- Boom arm and pop filter: $50
- Reaper license: $60
Both of these setups, paired with proper acoustic treatment and good mic technique, will produce audio that's ready for auditions, client work, and even commercial broadcast.
Start Recording, Start Learning
The best voiceover studio is the one you actually use. I've coached students who spent months researching gear and never recorded a single audition, and I've coached students who started booking work from a closet with a $100 mic.
Get your space set up, learn your signal chain, and start recording. Your ears will develop quickly, and you'll know when it's time to upgrade specific pieces.
If you want help dialing in your home studio setup or you're not sure your recordings are up to professional standards, I offer studio consultations as part of my coaching sessions. Send me a sample, and I'll tell you exactly what needs fixing. Sometimes it's a $10 solution that makes all the difference.
Get voiceover tips in your inbox
Trevor O'Hare
Voiceover Coach & Founder of VOTrainer
Trevor is a professional voice actor turned coach with over two decades in audio production. He has completed thousands of voiceover projects for brands of all sizes and now helps aspiring and working voice actors build their careers through 1-on-1 coaching, demo production, and online courses. He also works as a full-time voiceover artist at TrevorOHare.com. Looking to hire voice talent? Check out RealVOTalent.com.
Related Posts
Best Studio Headphones for Voice Actors and Narrators
Closed-back studio headphones are what you record, edit, and make final quality calls with as a voice actor working from home. Here are the specific models I recommend for clean monitoring, comfortable long sessions, and accurate self-editing.
How to Edit Your Own Voiceover Recordings at Home
Home studio actors searching for a workflow to clean up and deliver polished audio without a dedicated engineer.
Best Budget Mic for Voice Over: 3 Tiers for Every Budget
Choosing the best voice over microphone at any budget. Three tried-and-tested picks from $70 to $999, plus USB vs XLR advice and what actually matters for recording quality.